
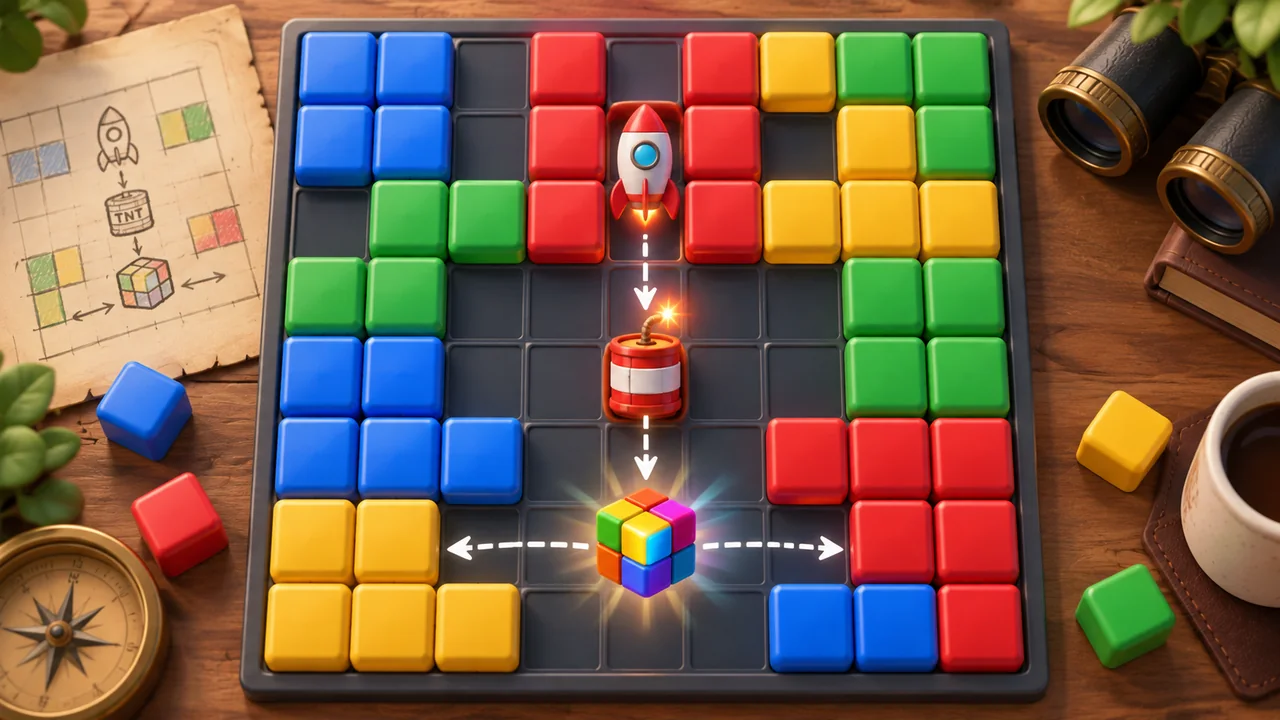
The best blast-puzzle move is rarely the one that removes the most cubes immediately. A stronger question is: what board will this move leave behind? This guide gives you a repeatable way to compare ordinary groups, directional boosters, area blasts and colour-clearing pieces without assuming that every game uses the same exact thresholds.
Start with the objective, not the biggest group
Before touching the board, identify whether the level asks for a score, a collection, an obstacle, a rescue or a route to the bottom. A ten-cube group on the opposite side of the objective can be less valuable than a four-cube group that opens the only useful column. Score is often a by-product of solving the board well, not the first priority.
Use a three-part move test
- Immediate effect: which targets, blockers or colours disappear now?
- Gravity effect: which pieces fall, and will separated colours become connected?
- Combination effect: does the move create or position a booster that can interact with another?
Run the test quickly for the two strongest candidate moves. You do not need to calculate the entire level. Looking one board state ahead is enough to avoid many wasteful clears.
Worked example: open space versus instant damage
Imagine a nine-column board with a rocket in column five, a bomb two cells below it and the final target behind a blocker on the right edge. Firing the rocket now clears one line but leaves the bomb isolated. Clearing a small blue group beneath the bomb may let it fall beside the rocket. If the game allows booster combinations, the setup move can produce a much wider clear on the next turn. If only three moves remain and the blocker can already be reached by the rocket, the direct move may be safer. The correct answer depends on the objective, remaining moves and the game’s documented combination rule.
Keep boosters out of dead zones
A powerful piece trapped against a corner or separated by unbreakable tiles may never affect the target. When you create a booster, check its orientation and future path. Directional pieces are strongest when their line intersects several goals. Area pieces work best near layered blockers. Colour-clearing pieces gain value when the board contains a concentrated target colour rather than an even mix.
When to combine—and when not to
Combining boosters is attractive because the animation is dramatic, but the combination is only efficient if its footprint overlaps useful cells. Two separate activations can be better when objectives sit in opposite corners. Conversely, a combined clear is excellent when it removes several blocker layers, triggers secondary pieces and reshapes the entire board at once.
Common failure patterns
- Using a colour clearer before the target colour has accumulated.
- Triggering a horizontal rocket in a row with no objective cells.
- Saving every booster until the final moves, then lacking space to activate them.
- Clearing the top repeatedly while the useful cascade must begin at the bottom.
- Assuming another game’s booster rules apply without checking the tutorial.
A compact routine for the next level
Read the goal, locate the hardest blocker, scan the lower half, compare two moves with the three-part test, and spend boosters when their useful coverage is highest. After each cascade, reset your plan—the old best move may no longer exist. For an archived example of this design family, see Toy Box Party Time.
Failure case: the beautiful combo that solves nothing
A common loss begins with a large colour group in the centre. The player spends a move creating a special piece, another positioning it and a third triggering a spectacular clear. The remaining targets sit behind corner blockers outside its footprint. The animation was large; the useful coverage was small. On a retry, mark the cells that must change and reject any setup whose final footprint cannot reach them.
Failure case: planning around a board that will not exist
Players sometimes calculate three moves ahead while ignoring an automatic cascade. If the first move removes support beneath several columns, replacement pieces will make the predicted second move unreliable. Plan deeply only in stable areas. Where gravity will reorder the board, plan the objective and desired space rather than exact colours.
Build a small decision score
When two moves look close, give each one point for touching an objective, opening a constrained column, creating a useful special piece and preserving a scarce target colour. Subtract a point if it spends the last access route or places a directional booster away from targets. This is not a game formula; it is a quick attention tool that helps prevent choosing by group size alone.
Limits of a general combo guide
Some games randomize booster direction, alter combination rules during events or include blockers that ignore particular effects. A general framework cannot predict those rules. Use the tutorial, level preview and visible board feedback as primary evidence. The framework is most valuable for comparing consequences after you understand what each piece actually does.
How this guide was produced
The editorial team compared common puzzle objective patterns, separated version-specific rules from general decision methods, and used hypothetical worked examples rather than claiming access to an unverified current build. Submit corrections through Contact.